How to reduce a photo to under 50 KB for an online form
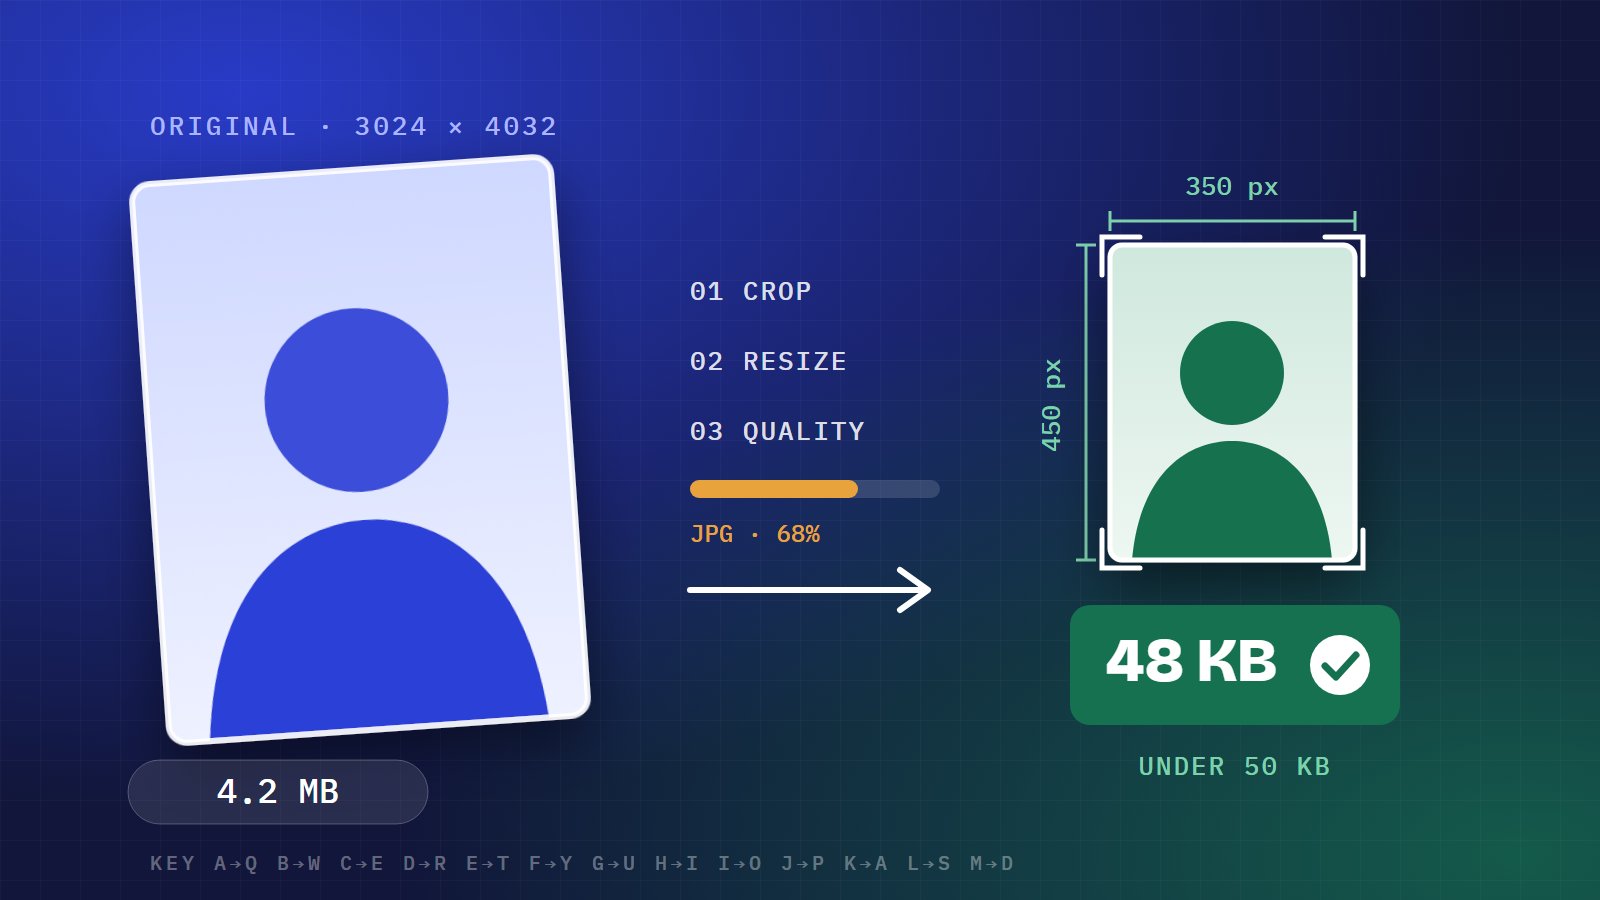
Government exams, job portals, visa applications and bank forms all ask for the same thing: a photo of an exact size, under a strict file limit, often 50 KB or less. A photo from a modern phone is usually 2 to 5 MB, so it needs to get about 50 to 100 times smaller. Here is how to do that without the form rejecting it, and without your photo turning into a blurry mess.
Why do online forms limit photo size?
Forms limit size so that millions of uploads stay quick to send and cheap to store, and so every photo prints and displays the same way on an ID card, admit card or application. The limit is not a judgement on quality. A photo that fills a 3.5 × 4.5 cm box does not need 12 megapixels.
What do the photo rules on a form actually mean?
Most forms give three or four rules. Read all of them before you start, because meeting one and missing another still gets the upload rejected.
| Rule | Example | What it controls |
|---|---|---|
| Dimensions | 350 × 450 pixels | The width and height of the image |
| File size | 20 KB to 50 KB | How big the file is on disk |
| Format | JPG or JPEG | The type of file |
| Print size | 3.5 × 4.5 cm | The shape (aspect ratio) of the photo |
If a form gives the size in centimetres and not pixels, keep the same shape. A 3.5 × 4.5 cm photo has a 7:9 ratio, so 350 × 450 pixels works.
How do you get a photo under 50 KB, step by step?
Do these in order. The order matters more than the tool you use.
- Crop to the shape the form asks for. Crop first so the face is centred and the shape matches, for example 7:9 for 3.5 × 4.5 cm. Leave a little space above the head.
- Resize to the exact pixel dimensions. Scale the cropped photo down to the size on the form, such as 350 × 450. This one step removes most of the file size.
- Save as JPG. JPG is built for photos and compresses far better than PNG.
- Lower the quality until it fits. Start around 85% and step down. Stop as soon as the file is under the limit. Most passport-style photos fit at 60 to 80%.
- Check the result. Look at the face at full size, and check the file size in your file manager before uploading.
Aim a little below the limit, for example 45 KB for a 50 KB rule. Some sites count 1 KB as 1,000 bytes and others as 1,024, and the safety margin covers both.
Why doesn't lowering the quality alone work?
If you skip the resize and only lower quality, the photo still has millions of pixels to store. You either cannot get under the limit at all, or you get there only at a quality so low that the face is blocky. Resizing first means the quality can stay high, because there is far less to store.
How do you shrink a signature to 10 or 20 KB?
Signatures have even tighter limits, but they are easier to compress because they are mostly white.
- Sign in dark blue or black ink on plain white paper.
- Photograph it in good light, with no shadows from your phone.
- Crop tightly around the signature with a small margin.
- Resize to the size the form asks for, often around 140 × 60 pixels, and save as JPG.
A clean white background compresses to almost nothing, so most signatures land well under 20 KB.
What gets a photo rejected?
- The right file size but the wrong dimensions, or the other way round.
- A stretched face, from resizing without cropping to the right shape first.
- A PNG renamed to
.jpg. The form checks the file itself, not just the name. - A file just over the limit because of the KB versus KiB difference.
- A dark or busy background when the form asks for a plain light one.
How do you do it on your phone?
You can do all of the above in most photo editors, but it means juggling crop, resize and export settings for every photo. We built Optipixa to do it in one step: you set the size the form asks for, such as "350×450 px, under 50 KB", and it finds the best quality that fits. It has presets for passport photos, signatures and A4 documents, handles up to 50 photos at once, and works entirely offline, so your ID photos never leave your phone. Optipixa is currently in closed testing on Android.
If you need a tool like this built into your own product or workflow, talk to us.
Frequently asked questions
Does reducing a photo to 50 KB make it blurry?
Not if you resize first. At form sizes like 350×450 pixels, a JPG at medium quality fits under 50 KB and looks sharp. Blur comes from squeezing a full-size phone photo into 50 KB by quality alone.
What is the difference between pixels and KB?
Pixels are the photo's dimensions, for example 350 wide by 450 high. KB is the file size on disk. Forms often set both, and you need to meet both: resize to fix the pixels, then adjust quality to fix the KB.
Can I upload a PNG instead of a JPG?
Only if the form allows it. Most forms ask for JPG, and for photos a JPG is usually several times smaller than a PNG of the same size.
Is it safe to use an online compressor for ID photos?
Online tools upload your photo to someone else's server. For passport photos, signatures and ID documents, it is safer to use a tool that works on your own device, such as Optipixa, which never uploads anything.